AoG ProTips: Account Linking Verification for Smart Home
Missed our weekly video? Don’t worry, watch this week’s #AoGProTips ????https://medium.com/media/d53dc054df6aa2a14488263d775fbecf/hrefSmart home Actions rely on account linking to authorize the Google Assistant to access a user’s devices, but this is a multi-step process that can be difficult to debug in production. When you encounter an OPEN_AUTH_FAILURE in your StackDriver logs, you need a way to interactively debug each step of the account linking integration to track down the root cause of the issue.Using Google’s OAuth Playground tool, you can interactively step through the account linking process with your cloud service in a secure way and verify whether Google is able to obtain the necessary authorization tokens. Let’s explore how to configure and use OAuth Playground.Configure OAuth PlaygroundNavigate to your account linking configuration for your project in the Actions console. You will use this information to configure the OAuth Playground tool.Actions Console OAuth Configura
Missed our weekly video? Don’t worry, watch this week’s #AoGProTips ????
https://medium.com/media/d53dc054df6aa2a14488263d775fbecf/hrefSmart home Actions rely on account linking to authorize the Google Assistant to access a user’s devices, but this is a multi-step process that can be difficult to debug in production. When you encounter an OPEN_AUTH_FAILURE in your StackDriver logs, you need a way to interactively debug each step of the account linking integration to track down the root cause of the issue.
Using Google’s OAuth Playground tool, you can interactively step through the account linking process with your cloud service in a secure way and verify whether Google is able to obtain the necessary authorization tokens. Let’s explore how to configure and use OAuth Playground.
Configure OAuth Playground
Navigate to your account linking configuration for your project in the Actions console. You will use this information to configure the OAuth Playground tool.
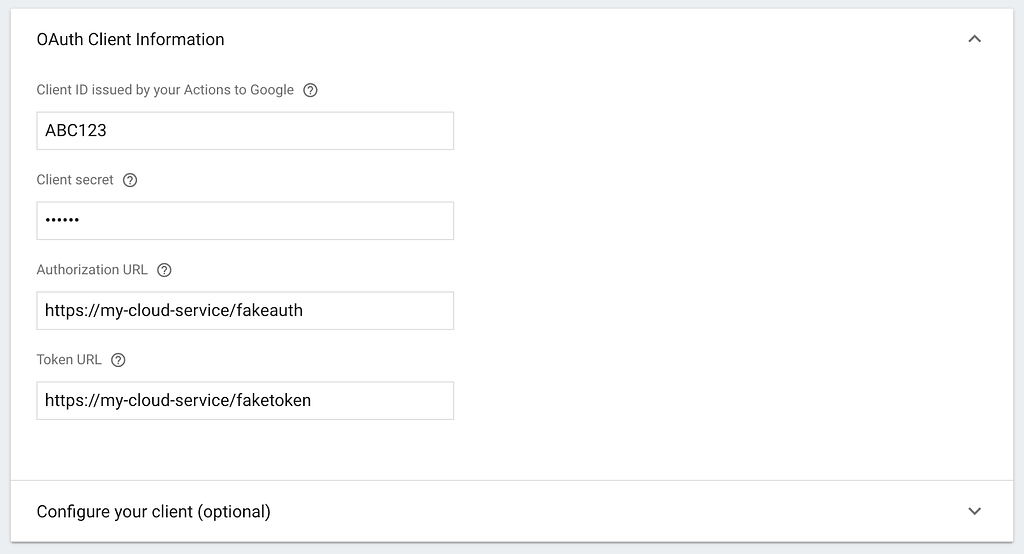
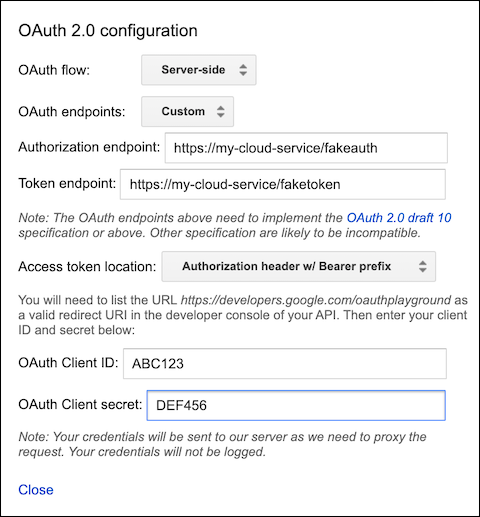
Launch OAuth Playground, and click on the gear icon in to open the OAuth 2.0 configuration dialog. Configure the interface as shown using the OAuth Client information from your Actions console project:
- Authorization endpoint: Set this parameter to the Authorization URL in the console.
- Token endpoint: Set this parameter to the Token URL in the console.
- OAuth client ID: Set this parameter to the same value as in the console.
- OAuth client secret: Set this parameter to the same value as in the console.
Link an account
We can now walk through the steps to obtain an access token from the OAuth endpoint.
Select & authorize APIs.
Enter any additional scopes your service requires in the text field that says Input your own scopes. If your service does not require any, enter something generic like “devices” and click Authorize APIs.
This will redirect to your Authorization URL to sign in. Once the sign in flow successfully completes, you will be redirected back to the OAuth Playground for step 2.
Exchange authorization code for tokens
This section is pre-filled with the authorization code returned by your service. Click Exchange authorization code for tokens to request token credentials from your Token URL.
If successful, the refresh token and access token will populate in the UI.
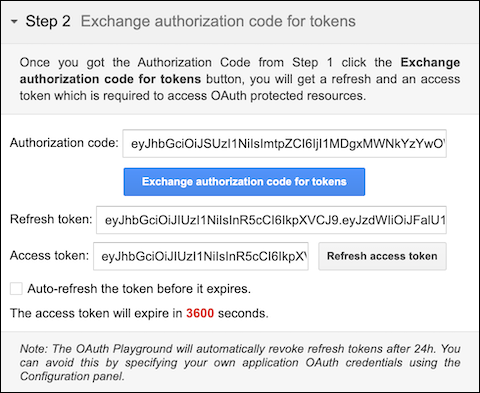
Verify that you can successfully execute a token refresh against your account linking endpoint by clicking the Refresh access token button in the Playground UI. If you get an error at this stage, it is likely because your service is not properly accepting the refresh token it initially generated as valid.
Check for errors
OAuth Playground clearly displays the request and response for each step, allowing you to determine exactly which stage in the account linking process may be failing.
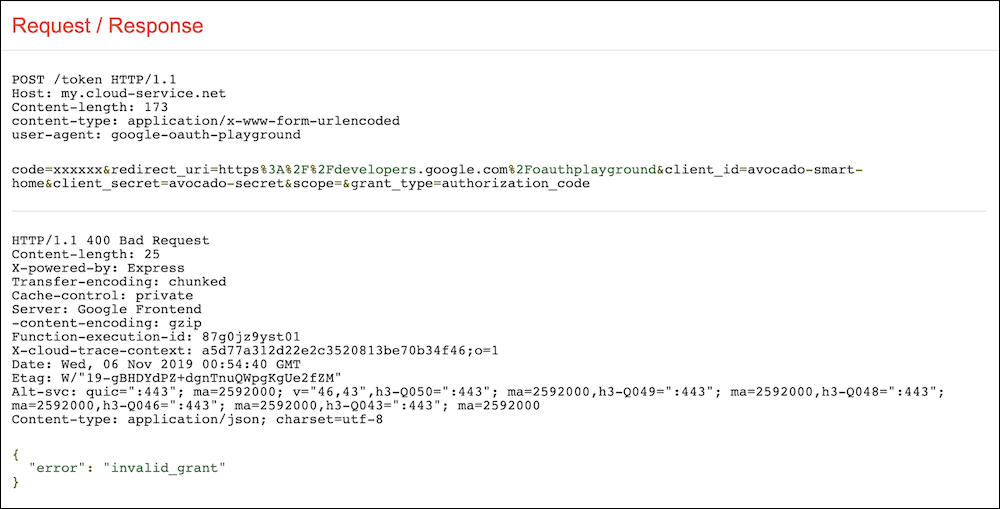
If you do not encounter any errors obtaining a user access token from your service, you can attempt to use that token to invoke a smart home intent.
Send an authorized request
The final step is to verify your service will successfully accept the credentials attached to a smart home intent request. Let’s configure the tool to send a sample SYNC request.
Configure request to API
Expand this section in the Playground UI, enter your fulfillment URL from the Actions console as the Request URI, and set the HTTP Method to POST. Verify that Content-Type is set to application/json and enter the following sample request body:
{
  "requestId": "ff36a3cc-ec34-11e6-b1a0-64510650abcf",
  "inputs": [{
    "intent": "action.devices.SYNC"
  }]
}
Click Send the request and verify that your service successfully returns a SYNC response with a valid agentUserId.
Learn more
For more helpful tips on getting the most out of your actions, be sure to check out the rest of the AoG ProTips video series — and share your thoughts with us on Twitter using the hashtag #AoGProTips.
AoG ProTips: Account Linking Verification for Smart Home was originally published in Google Developers on Medium, where people are continuing the conversation by highlighting and responding to this story.
What's Your Reaction?